How to Build a Shed from Scratch in a Weekend
If you’ve ever wanted to learn how to build a shed from scratch, this blog post is for you! Building a shed can seem like a daunting task, especially if you’ve never done it before.
But with the right tools, materials, and step-by-step instructions, it’s totally possible to build a shed in just one weekend.
In this blog post, we’ll walk you through the entire process, from gathering your materials to making sure everything is built properly.
Building a shed from scratch can be an intimidating prospect, but it doesn’t have to be. If you’re up for a DIY project, you can build a shed in just one weekend!
With a few basic tools and the right materials, you can build a shed that will last for years to come. This blog post will walk you through the steps of how to build a shed from scratch, so you can get started on your own DIY shed project with confidence.
If you’ve ever considered how to build a storage shed from scratch in a single weekend, you’ve come to the right place. Building a shed is not as daunting as it may sound and, with the right guidance and materials, it’s entirely possible to complete a DIY shed in a weekend.
This blog post will provide step-by-step instructions on how to build a shed from start to finish. So if you’re eager to get your hands dirty and build a shed of your own, read on!
Planning
Building a shed from scratch can seem like an intimidating task, but with proper planning and preparation it can be done in as little as a weekend.
Before you get started, there are a few things you should consider to ensure the process is as smooth and successful as possible.
First, think about where your shed will be located on your property. Make sure the area is level and measure out the space so you know exactly how much room you have to work with.
Next, decide what type of shed you’d like to build. Consider the size, shape, and design elements to determine which materials and tools you’ll need for the job.
Finally, make sure you have all the necessary tools and materials for your project before you start.
You may need things such as a hammer, drill, saw, screws, nails, plywood, 2x4s, lumber, and other building supplies. Don’t forget to check if you need any special permits or permissions to build a shed on your property.
With all these considerations taken into account, you’re now ready to begin your shed building project! Start by sketching out some basic plans that include measurements, angles, and dimensions.
Then review them to make sure they’re accurate and make adjustments as needed. Once your plans are finalized, create a list of the materials you’ll need and shop around for the best deals.
Keep track of all your costs while shed planning so you stay within your budget.
If drawing or designing are not your strong suit, consider purchasing your shed plans. There are many free shed plans online, just make sure all areas of building a shed are covered.
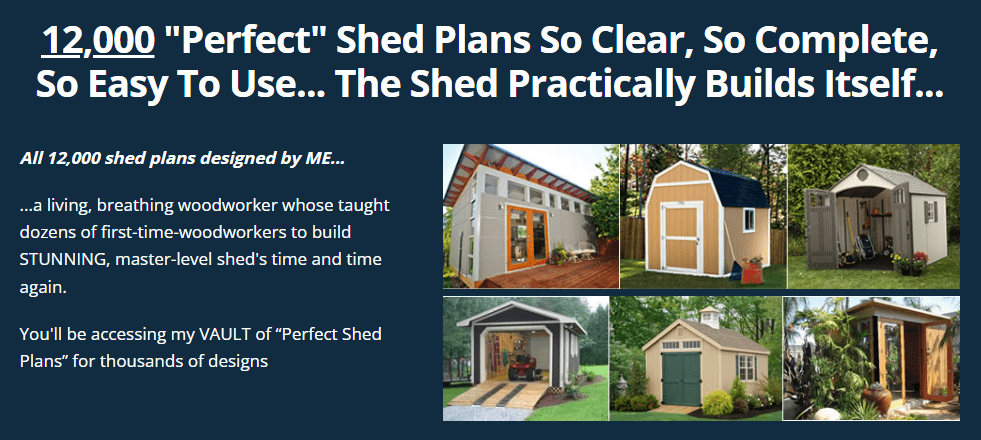
You can buy a complete building set of plans with added steps that cover the design, build and finish phases like the ones sold by MyShedPlans.
Once everything is purchased, lay out all the materials on the ground in their correct locations so you don’t mix anything up during assembly.
This step-by-step approach will ensure that everything goes according to plan when it’s time to put together your shed.
The next step in shed planning is to create detailed shed plans that outline every step of the construction process.
A good set of shed plans will help keep your project organized and help ensure accuracy throughout the build.
Be sure to draw each part of the shed accurately and clearly label each piece and its dimensions.
Also, note down important details such as angles, lines, cuts, and surface treatments for each part of your shed design.
Doing this will guarantee that no mistakes are made when putting the shed together.
With these shed plans in hand, you can now confidently move forward with constructing your shed from scratch over the course of a weekend.
Gather Materials
When you’re building a shed, it’s important to make sure you have all the materials you need before you start. To build a shed, you’ll need lumber, fasteners, siding, roofing materials, and door and window materials. To get started, consider measuring the area of your planned shed and then creating a list of the materials you’ll need to purchase. Depending on the size of the shed, you may need more lumber for the frame, or you may need additional siding and roofing materials to cover the entire structure. You can also buy pre-cut shed kits that include all of the necessary building a shed materials, or you can look into purchasing individual pieces of shed materials like nails, screws, hinges, and fasteners. With all of your materials ready, you’re ready to get started on building your shed. Start by assembling the shed base and constructing the walls. Make sure to use the appropriate building a shed materials such as pressure treated lumber and stainless steel hardware so your shed will be durable and long lasting. Once your walls are framed and secured, begin covering them with shed materials such as plywood sheathing or OSB boards. If you purchased shed kits, follow the instructions that came with it as closely as possible. The kits typically come with a detailed plan and the shed materials already cut to the proper sizes. Make sure when building your shed walls that you secure them together using treated wood screws or nails. The screws should penetrate at least 1/2 inch into the wood frame. After framing your shed walls, cover them using shed materials such as plywood sheathing or OSB board. Secure these materials using galvanized roofing nails or staples. Finally, cover the roof using tar paper, metal roofing panels, asphalt shingles, or cedar shakes. These types of building a shed materials will help protect your shed from inclement weather and keep it looking good for many years.
Lay the Foundation
Creating a solid foundation is the first step in constructing your shed. Depending on the size of your shed and your budget, you can choose between installing a concrete slab or setting posts.
If you are going with a concrete slab, you will need to dig out the area where you want the slab to be and level it off. You will then need to fill it with gravel and use concrete forms to pour the concrete. Make sure that you use enough gravel so that the top of the slab is even with the ground when finished.
If you decide to set posts for your shed foundation, you will need to dig holes for the posts and ensure that they are level. Once the posts are in place, you will need to lay cross beams between them and use either planks of wood or gravel and sand to form the base of your shed.
Whichever option you choose, make sure that the foundation is level, strong, and able to support the weight of your shed and its contents. A strong foundation is essential for the longevity and stability of your shed. Concrete footings are one way to help support your shed’s posts and provide extra stability against shifts in the ground. To install concrete footings, start by digging 12-inch-deep postholes around the perimeter of the planned shed foundation. Next, pour concrete into each hole until it reaches 3-4 inches below grade. Then add 2-3 inches of pea gravel on top and compact with a tamper until level. Finally, set 4×4 posts into each footing and secure with concrete anchors.
For larger sheds, building a concrete slab foundation may be preferable. This involves digging out the area where the slab will go and leveling the soil before laying down rebar and pouring concrete. Afterward, use a mason’s trowel to smooth out any rough patches before adding expansion joints as needed.
When finished, your new shed should have a sturdy and reliable concrete slab foundation! However, before beginning construction of your concrete slab foundation, it is important to call811 to check for underground utilities in order to avoid damaging them. Also remember to check local codes and zoning regulations as well as applicable building codes in order to ensure that you are compliant with all requirements prior to beginning construction.
Once all necessary steps have been taken, begin by preparing the site by removing grass and other vegetation as well as roots and stones. Start by digging postholes about two feet deep for each corner post and position the posts inside the postholes. Pack gravel or concrete footings around the posts and make sure that the posts are securely fastened in their positions. Then continue with preparing the shed foundation by pouring concrete into the postholes and levelling it off. Finally, reinforce the concrete slab foundation with steel reinforcing bars spaced every two feet across the entire surface of the slab. Allow the concrete to dry overnight and voila – you now have a strong, stable foundation for your shed!
Assemble the Walls
Building walls for a shed is one of the more difficult steps when it comes to construction. However, if done correctly, you will have a sturdy and long-lasting wall framing. To frame a wall, you will need to measure and cut lumber that matches the measurements of your shed and make sure to use galvanized nails when attaching them together. It’s also important to make sure your wall frames are level and straight before you attach them to the floor.
Once you have your wall frames put together, it’s time to attach them to the floor. Make sure to measure carefully and mark where each stud should go before screwing them into place. Use an electric drill with lag screws or nails for this part of the job.
When your walls are up, you can begin adding the sheathing. Sheathing is usually plywood or OSB (oriented strand board) that covers the walls and provides protection from moisture and pests. Use construction adhesive on all seams for added protection against water and wind damage.
Finally, once your shed walls are framed and sheathed, it’s time to add the siding. Choose siding that suits the aesthetic of your home and climate. It’s also important to seal all the seams and edges with caulk to prevent moisture infiltration. After everything is in place, your shed walls will be complete!
Doors and Windows
When building a shed, it’s important to ensure that doors and windows are secure. Doors and windows should be made of strong, durable materials such as metal or wood and fitted with locks for security. They should also be inspected regularly for signs of wear and tear. Additionally, when not in use, make sure to keep your doors and windows closed and locked.
When installing your doors and windows, you’ll need to create a rough opening, or the space between the door framing and the wall studs. When purchasing your shed doors and windows, be sure to measure this opening correctly to ensure a proper fit. Some shed windows are designed to open, while others are fixed and can only be opened with a tool. Be sure to select the right style for your needs.
No matter what type of shed doors and windows you choose, make sure they are fitted securely and inspected regularly. Keeping them in good working order is essential for home security. After measuring your rough opening accurately, install window framings and door framings around the opening according to the manufacturer’s instructions. If you’re looking for additional privacy, consider adding curtains or shades to shed windows that open. If necessary, purchase additional hardware such as screws or nails to ensure a secure fit for shed doors and windows. Make sure hinges are aligned properly and tight so that the shed door closes properly. Finally, check periodically to make sure all components remain intact and in proper working condition. By taking the time to install shed doors and windows properly, you’ll have peace of mind knowing that your shed is safe and secure.
Put on the Roof
Once the walls of your shed have been erected, it’s time to put on the roof. The easiest way to do this is by using easy roof trusses specifically designed for a shed roof. Shed roof trusses are engineered to provide the support needed while reducing the amount of labor needed to build a shed roof.
When assembling the trusses, make sure they are level and securely attached to the wall frames using screws or nails. If necessary, you can use some additional bracing across the bottom chords of the trusses for extra support.
Once all of the trusses are in place, install a ridge board along the peak of the roof. This will help keep the trusses together, adding extra stability and strength to your shed roof. Finally, cover your trusses with sheathing and attach the roofing material of your choice – shingles, metal, or whatever else you like.
And there you have it! A secure, sturdy shed roof that is sure to stand up against the elements. With a little patience and know-how, you can have a beautiful shed that you can be proud of. Learning how to build trusses for a shed will save you time and money when building your own shed. By using easy roof trusses, shed roof trusses, or any other type of shed roof, you can create a shed with an attractive look without breaking the bank. Building a shed roof truss requires careful planning but once completed, it offers the perfect combination of functionality and durability. Make sure to measure twice before cutting once and remember to always use appropriate fasteners to ensure maximum safety. Additionally, keep an eye out for any potential weak points so that your shed roof won’t become damaged due to adverse weather conditions. With these tips in mind, you’ll soon be ready to start building your very own shed from scratch! To learn more about how to build trusses for a shed, visit your local hardware store or search online for step-by-step tutorials. You may even want to invest in a set of shed plans to ensure that everything comes together properly. Using easy roof trusses and shed roof trusses is one of the simplest ways to get started constructing your shed roof, as they already come pre-built and can easily be adjusted to fit your shed’s dimensions. Before long, you’ll have created the shed roof of your dreams – one that will withstand anything Mother Nature throws at it.
Add the finishing touches
Installing 4 x 8-ft. sheets of siding is a fast and economical way to cover the walls of your shed. Wall paneling and wall siding are great choices for creating a strong, sturdy structure. To give it an extra touch of beauty, add wide corner boards, wide window and door casing, and a horizontal band at the base and top. These details will make your shed look like a masterpiece instead of just a utilitarian-looking structure. With these extra touches, your shed will look great and last a long time.
Permits
Building a shed on your property can require certain permits depending on the size and scope of the project. Shed permits are typically required for structures larger than 10 square metres in some jurisdictions.
Make sure to check your local building codes to find out if you need a permit for your shed. If a permit is required, contact your local council to determine the proper paperwork that needs to be submitted and the fees associated with obtaining the permit. Once approved, the permit will allow you to legally build the shed on your property. Failing to get a permit when one is required could result in fines and other legal issues.
Final Thoughts
Building a shed can be as hard as you make it but having a good set of plans is a tremendous benefit. You can find free shed plans such as those offered by Shedplans.org where you can find many free and premium paid plans.
But if you need plans that are applicable to any shed size that include higher build details including foundations, material and finish topics, consider buying from MyShedPlans.

Whatever you decide, start with solid idea and it will soon turn into a reality.